![]()
Each spool made for this doll is hand lathed. This is Dollhouse size 1:12 scale.
This tutorial was generously donated by Kathi Mendenhall.
![]()
Spool Doll
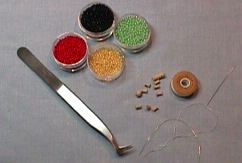
The items needed for your spool doll are: Spool doll parts, round bead head, large spool torso and 8 spools for the arms and legs. You will also need 15 seed beads for the joints. (Mine are pictured in different colors, but it is up to you. These are regular size 14° Mill House beads.) You will need either a beading needle or beading thread, looks like very fine dental floss, or you can use 28 gauge or finer beading wire, and finally, scissors, glue or wire cutters for wire.
|
Step 1 & 2 Space the items for easy access on your work surface. Remember the large spool is the torso, so the tiny holes through the side are the arms. They go to the top or closest to the head.
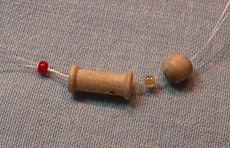
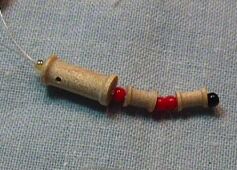
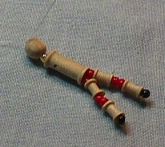
Step 3 & 4 Thread approximately 18 24 of beading wire into beading needle. I like to have plenty so I dont drop beads as I go along. Starting at the round bead for the head, thread this onto the beading needle, next pick up one bead for the neck, the long spool for the torso, and another bead for the left leg. Pull through leaving a tail to tie later at the top of the head.
Step 5 Now thread a spool, two beads for the knees, and another spool. Finish with a final bead for the foot.
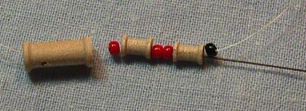
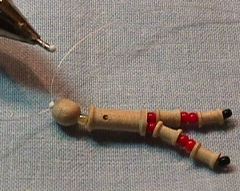
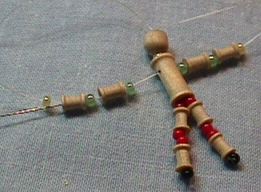
Step 6 & 7 Loop over the neck bead and back through the body repeating the beads the same as the right side. Go around the foot bead to secure it and back up through the entire leg and torso, through the neck and back through the top of the head.
Step 8 & 9 Place a dot of glue at the top of the head and tie a slip knot two times. Trim away excess but not close. You will let the glue dry and do that at the end. You just want the strings to be out of your way while you work on the arms.
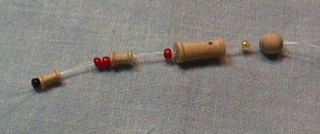
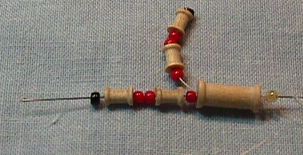
Step 10 & 11 Thread a bead for a hand, a spool for the forearm, a bead for the elbow, and another bead. Insert this through the arm section of the torso spool, and bead the needle in the reverse for the opposite arm.
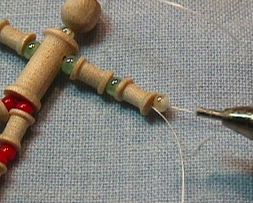
Step 12 When you get to the hand bead, treat the same as you did the foot. Thread it onto the needle and then go around it to secure the hand. Send the needle back through both arms. Exit just before the hand bead on the opposite side.
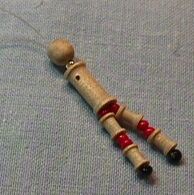
Step 13 Place a dot of glue and tie off with a slip knot at the hand. I make two of them. When the glue is dry, trim all the threads close to the beads.
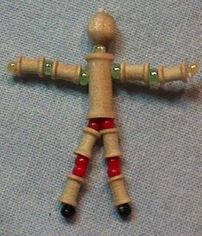
Step 14 Voila finished spool doll! You can take a step further and paint a face if you desire. Have fun, Kathi
|
![]()
Thank you for visiting my site and hopefully you enjoyed my tutorial.
Just as a gentle reminder, that tutorial was written to help to stimulate your creativity.
This Tutorial, Pictures, & Instructions are copy-righted & are not to be used as a tutorial of your own.
This means you may not copy and post this tutorial to your own website, or print it out and sell or distribute it as your own.
![]() [an error occurred while processing this directive]
[an error occurred while processing this directive]