![]()
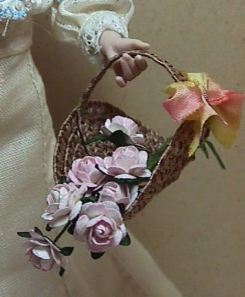
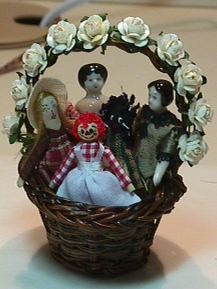
This charming flower basket was made for a larger doll but can easily be adjusted for a miniature or even a larger or modern doll. Bonus How-to on decorating another flower basket.
This tutorial was generously donated my IGMA Artisan Kathi Mendenhall What a Gal!!
![]()
Make a Flower Basket out of Hat Straw/Braid
|
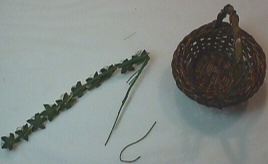
Supplies
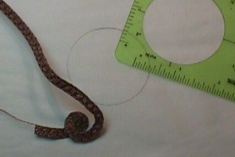
Step 1
Draw a 2 circle with a template to assist in keeping the circle round. You need about 1 yard of hat straw. Trim away about 4 from the end. You have a 32 and a 4 piece.
Step 2
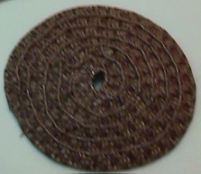
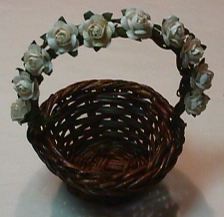
Pull the string of the long piece until the straw begins to coil. Use your circle and some glue and glue the hat straw in a round until complete. Set aside to dry. Step 3
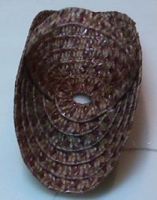
Place a small bead of glue along the inside edge and place the end of the 4 piece there. This will become the handle. Roll or fold the straw circle until you have the shape you desire and then glue the other edge of the straw to it. Trim away any excess. Step 4
Decorate a Basket
Make a hook at one end and attach the roses to the purchased basket handle. Use the wire for the top middle and the rest of the attached wires for the opposite end of the handle. Let the flowers fall a little forward of the handle for a pretty display. For this project I collected up some of my tiny rag dolls and porcelain dolls. All were made in classes, club nights, were gifts or purchased. Use whatever you want to display. What about a tiny fairy? Finally, finish off the side of the handle with some vintage ribbon or even new bias ribbon, or whatever you have from your scrap box. A Drum Roll please....dadadada
|
![]()
Thank you for visiting my site and hopefully you enjoyed my tutorial.
Just as a gentle reminder, that tutorial was written to help to stimulate your creativity.
This Tutorial, Pictures, & Instructions are copy-righted & are not to be used as a tutorial of your own.
This means you may not copy and post this tutorial to your own website, or print it out and sell or distribute it as your own.
![]() [an error occurred while processing this directive]
[an error occurred while processing this directive]