![]()
After hording this parasol frame for many for years I have decided to release it. Kathi has put the beautiful parasol together for us all to enjoy. The parasol can be shaped on many ways. See the bottom of the tutorial for a version of the frame that I shaped. The spokes are remarkable pliable when wet. But do be careful as the frame parts are fragile. This is Dollhouse size 1:12 scale.
This design was generously donated by Kathi Mendenhall.
![]()
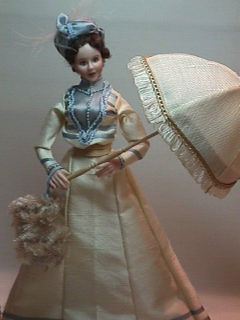
Open Parasol
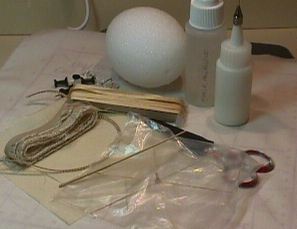
Parasol Parts
3" Styrofoam ball or egg
Fine mist spray of water
12 push pins
pattern
glue with fine tip and sharp scissors
air erasable pen
3" X 10" of fabric
trims of choice, 10" around
6" of 4mm ribbon for ruching
Not shown - embroidery floss to make a tassel
|
Step 1 Before beginning this project you must give a little thought to the look you want to achieve. For this introductory tutorial I did not, for example, finish the wood in the original parasol kit. You may want to paint of stain your handle and at minimum seal it. Select your fabrics and trims with scale in mind.
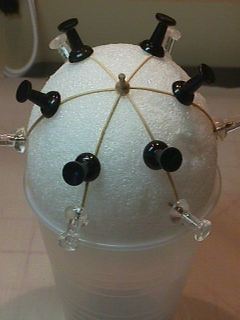
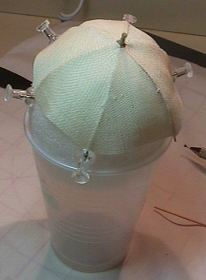
Select a 3 Styrofoam ball or egg. If you use and egg, as I did, use the wide end. Press the center of the spokes into the center of the Styrofoam just to make a small depression. This allows you to work without having your work slip on you.
Step 2 Lightly spray the spokes with some warm water, or just a fine mist of room temperature water. (I did not soak the spokes as I did not want the spokes to come loose from the top. Once the spokes are damp, carefully and slowly press each down about 1 away, and hold down with the edge of a push pin. Finally, coax the ends down and do the same. Let dry overnight. (I do not know if coaxing with a hair dryer will work, but overnight is perfect.)
Step 3 To achieve the pattern draw a triangle.
Draw the base 2" long. Then bisect it. From the center draw the perpendicular line up 2" also.
Join that top line to the ends of the base to form the full triangle. About 1/4" from the top draw a semi-circle.
Then mark the bottom, the top and the straight grain. The bottom is the base, the top
is where the semi-circle is and the straight of grain is the straight line down the center. PLEASE NOTE: Please test fit as I am sure your parasol
shape may be slightly different then mine.
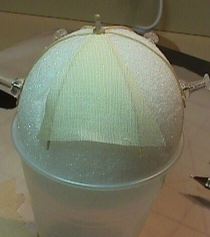
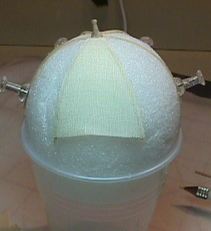
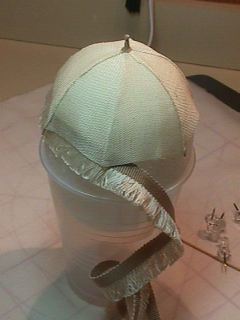
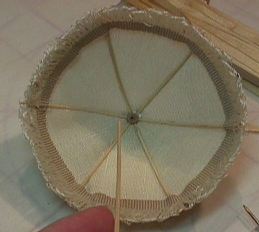
Step 4, 5 & 6 Center each piece as you go around and glue the pieces to the spokes. Center the top, and the middle down between the spokes. The sides are on the bias and may stretch. Fit it tightly to your shape and glue down to the spokes. Then trim away any excess. (The reason the pattern is not perfect is that you may select a different sized egg or ball and this gives you some leeway for fitting.) As you complete the fitting of each piece of the parasol, pin the tip back down with the push pin.
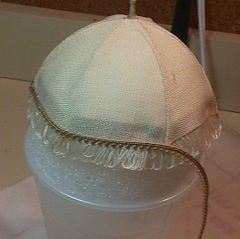
Step 7 & 8 Glue the edge trim around the bottom. This can be on the top or the bottom, again, depending on the look you are trying to achieve. Since I wanted to the use the fringe trim, the top portion is a little heavy, I glued this to the underneath. To finish the top and hide the unfinished edge, I glued the eyelash fringe along the edge.
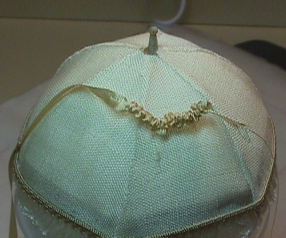
Step 9 Ruche some 4mm silk ribbon and glue around the parasol top. This finishes the top edge.
Step 10 & 11 Insert the handle and position with your figure.
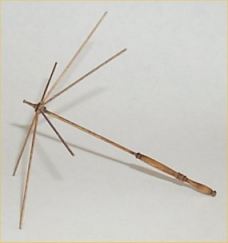
This is the frame I put together. I stained it first and then glued it together and then soaked and shaped it. This was kind of tricky because the glue did not like to hold in the stained areas...and then to add water...eck! I also cut the spokes down quite a bit...as you can see it is versatile. I see it in Gold Leaf...oohhh ahhhhh!
|
![]()
Thank you for visiting my site and hopefully you enjoyed my tutorial.
Just as a gentle reminder, that tutorial was written to help to stimulate your creativity.
This Tutorial, Pictures, & Instructions are copy-righted & are not to be used as a tutorial of your own.
This means you may not copy and post this tutorial to your own website, or print it out and sell or distribute it as your own.
![]() [an error occurred while processing this directive]
[an error occurred while processing this directive]