Baby in a Christening Gown
Instructions are for miniature (doll house) size Baby.
| Step
1
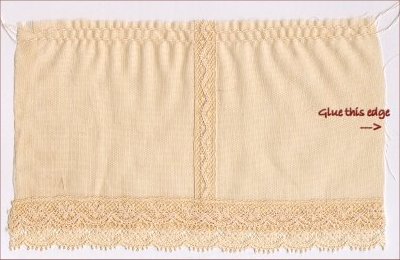
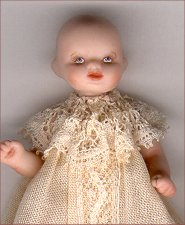
Your fabric should measure approx 2-3/4" x 5". You can make it fuller or longer depending on your preference. Decorate to you delight now. I add a piece of insertion down center front and two rows of lace at the bottom. Machine sew 2 rows of gathering stitches at the top edge.
|
Step
2
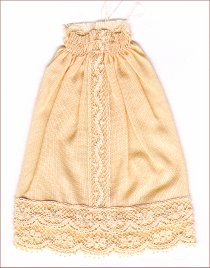
Pull any gathering stitches out seam allowance, approx 1/8" from the edge. Glue short edge right side together (see picture in Step 1). Turn right sides out. Pull both top threads from both side of the 2 gathering lines. Pull ONLY the top threads! Pull tight.
|
| Step
3
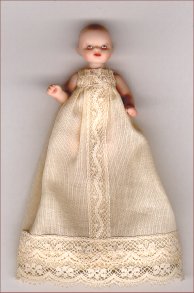
Put the dress onto the baby and glue the gathered portion up as high in the chest as possible. You may have to trim up the raw edge on the top edge. Push the fabric up under the arms. Adjust the gathers evenly. I usually do not have any gathers right under the arms so there is not as much fabric right under the arms. You can also snip the fabric right under the arm a scant 1/16" but DO NOT do this unless the rest is glued down or you will lose your gathers. Also, I tie the gathering threads from each side to the other in the back in a tight knot. This assures that the gathers will be tight and smooth against the dolls body.
|
Step 4 With another piece lace ( bit over 2-1/2"). Pull the threads in the header to gather.
Glue this around the neck of the baby. Adjust the gathers well. Fullness is up to you. I also glue each gather into position especially right in front and in back of the arms so it drapes correctly. |
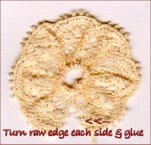
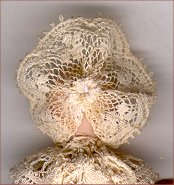
| Step
5
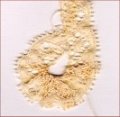
For the bonnet take another piece of lace approx 2-1/2" and pull gather threads at header. Pull this very tight. If you lose the header threads you can hand gather by stitching. Turn under each raw edge and glue. You can add the wig at this time if you want. Glue the lace "disk" to back of dolls head. Adjust the lace edge to frame the face of the doll. Adjust the gathers very evenly and glue into place.
|
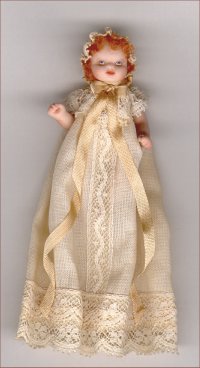
Step 6 The finishing touches: Add a ribbon bow with long streamer to the center front. Add a chin strap of silk ribbon to the bonnet from ear to ear. Add a bow on each side of bonnet right under ears to cover the cut ends of the chin strap. I added the wig at this time just gluing curls here and there amongst the gathers in the bonnet. Make draped folds in the dress and steam so he/she does not look like a dinner bell. Enjoy!!
|
Thank you for visiting my site and hopefully you enjoyed my tutorial.
Just as a gentle reminder, that tutorial was written to help to stimulate your creativity.
This Tutorial, Pictures, & Instructions are copy-righted & are not to be used as a tutorial of your own.
This means you may not copy and post this tutorial to your own website, or print it out and sell or distribute it as your own.