Straw Hat Making 101
Instructions are for Dollhouse size Straw Boater.
Here is what you will need:
- Swiss Hat Braid
- Glue, 3/4" Dowel, Mini Iron

Step 1
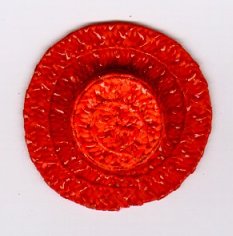
The Crown
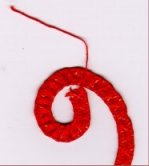
There is a linen cord/string woven in on either side of the hat braid. Pull this cord (either side) gently BUT firmly to curl the straw. Do not pull hard or you risk breaking the straw or pulling it all the way out.
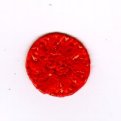
Glue (or stitch if you have to) straw into a 3/4" tight circle. To do this put a very bit of glue on the edge and overlap barely 1/16" on straw edge. Cut the end of the straw at an angle to help hide the cut end.
Press Flat with steam iron.
Step 2
Step 3
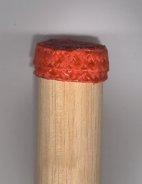
Glue two flat strips of hat braid together lengthwise. Glue the second strip not on edge but half way covering the second strip. This will define the crown height so make it as tall as you would like. They should be long enough to go around a 3/4" dowel. Glue the ends together around the dowel and then glue the disk made in step 1 on the top. Barely glue the edge. If you need more glue then add more to the inside so it won't be seen.
Step 4
The Brim
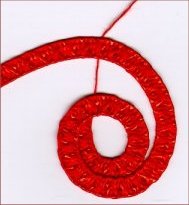
Pull the cord again as in step 1. Curl, by pulling cord approx. 7 - 8" worth of straw. But instead of making a tight disk as in the crown, leave a hole in the center that is approx. 5/8". Curl around and around gluing each subsequent layer just barely 1/16" over the edge of the layer before. Go around at least three times but this is your preference. Cut the end of the straw at an angle to help hide the cut end.
Step 5
Glue the crown to the brim at the center and decorate to your hearts content.
Step 6
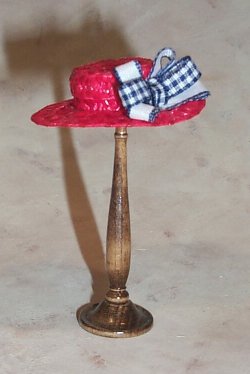
Here is the finished Hat. Enjoy....!
Copyright © 2009-2020 Doll Artist's Workshop